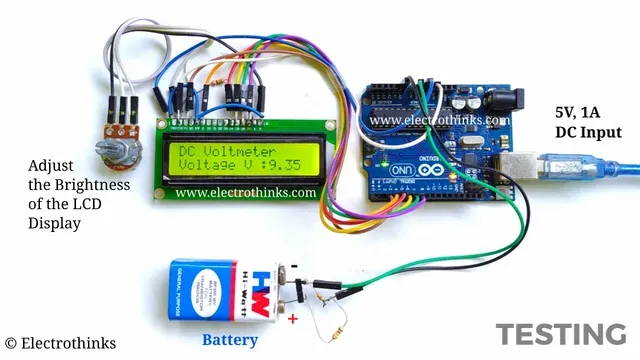
In this Arduino project, I will show you step by step how to make Digital DC Voltmeter that can measure voltages 0 to 30 volts.
Let's make it!
Step 1: Components List
The following components are needed to make this voltmeter.
- Arduino Board (1 pcs)
- 16*2 LCD Display (1 pcs)
- 10KΩ Potentiometer (1 pcs)
- R1: 0.25W 330Ω Resistor (1 pcs)
- R2: 0.25W 100KΩ Resistor (1 pcs)
- R3: 0.25W 10KΩ Resistor (1 pcs)
- Jumper Wires (as per required)
- 5-12V DC Power Supply (1 pcs)
Others:
- Soldering Kits
- Breadboard (Optional)
Step 2: Circuit Diagram
Schematic of an Arduino based digital dc voltmeter circuit shown below.
Circuit Explanation
In a basic digital voltmeter, the voltages to be measured using ADC (Analog to Digital Converters) feature.
Hence, the ADC feature is utilized in this Arduino project.
The range of voltages for an Arduino Board analog input is 0V to 5V.
To increase this range, a voltage divider circuit must be used.
The range of the analog input of the Arduino Board is increased up to 30V by using a voltage divider consisting of 100KΩ resistor (R2), and 10KΩ resistor (R3) [See the circuit diagram avobe].
This divider is stepped down the measuring input voltage to the range of Arduino Board analog input.
The rest of the calculations are made in the programming part.
Step 3: Assembling and Soldering the Components
Here, I simply assembled the circuit without the breadboard and soldering the connections.
Step 4: Programming Part
Download the Arduino IDE.
The source code / program for interfacing 16*2 LCD display with Arduino and calculations is given below.
Copy this code and upload it to Arduino Board.
#include
LiquidCrystal lcd(2, 3, 4, 5, 6, 7);
int analogInput = 0;
float vout = 0.0;
float vin = 0.0;
float R1 = 100000.0;
float R2 = 10000.0;
int value = 0;
int a[5] = {};
void setup() {
 Serial.begin(9600);
 pinMode(analogInput, INPUT);
 lcd.begin(16, 2);
 lcd.setCursor(2, 0);
 lcd.print("DC VOLTMETER");
 lcd.setCursor(0, 1);
 lcd.print("By Electrothinks");
 delay(3000);
 lcd.clear();
}

void loop() {
 lcd.print("DC Voltmeter");
 value = analogRead(analogInput);
 vout = (value * 5) / 1024.0;
 vin = vout / (R2 / (R1 + R2));
 Serial.println(vin);
 if (vin < 0.09)
 {
 vin = 0.0;
 }
 lcd.setCursor(0, 1);
 lcd.print("Voltage V :");
 lcd.print(vin);
 delay(3000);
 lcd.clear();
}
Step 5: Demo & Testing
Now, I am going to show you below the demo of Arduino based digital dc voltmeter.


Make video
ReplyDelete